Cloudflare Tunnels: You don’t need Nginx proxy
Exposing containerized applications isn’t straightforward. I’ve got a dedicated server for Docker containers with a few different supporting components. I need to take care of routing, SSLs, web sockets, paths, and other bits of Nginx configuration.
Cloudflare states that this can be done easier and faster with:
no open ports,
no exposed public IP,
SSL certificate,
and completely free.
Let me check that…

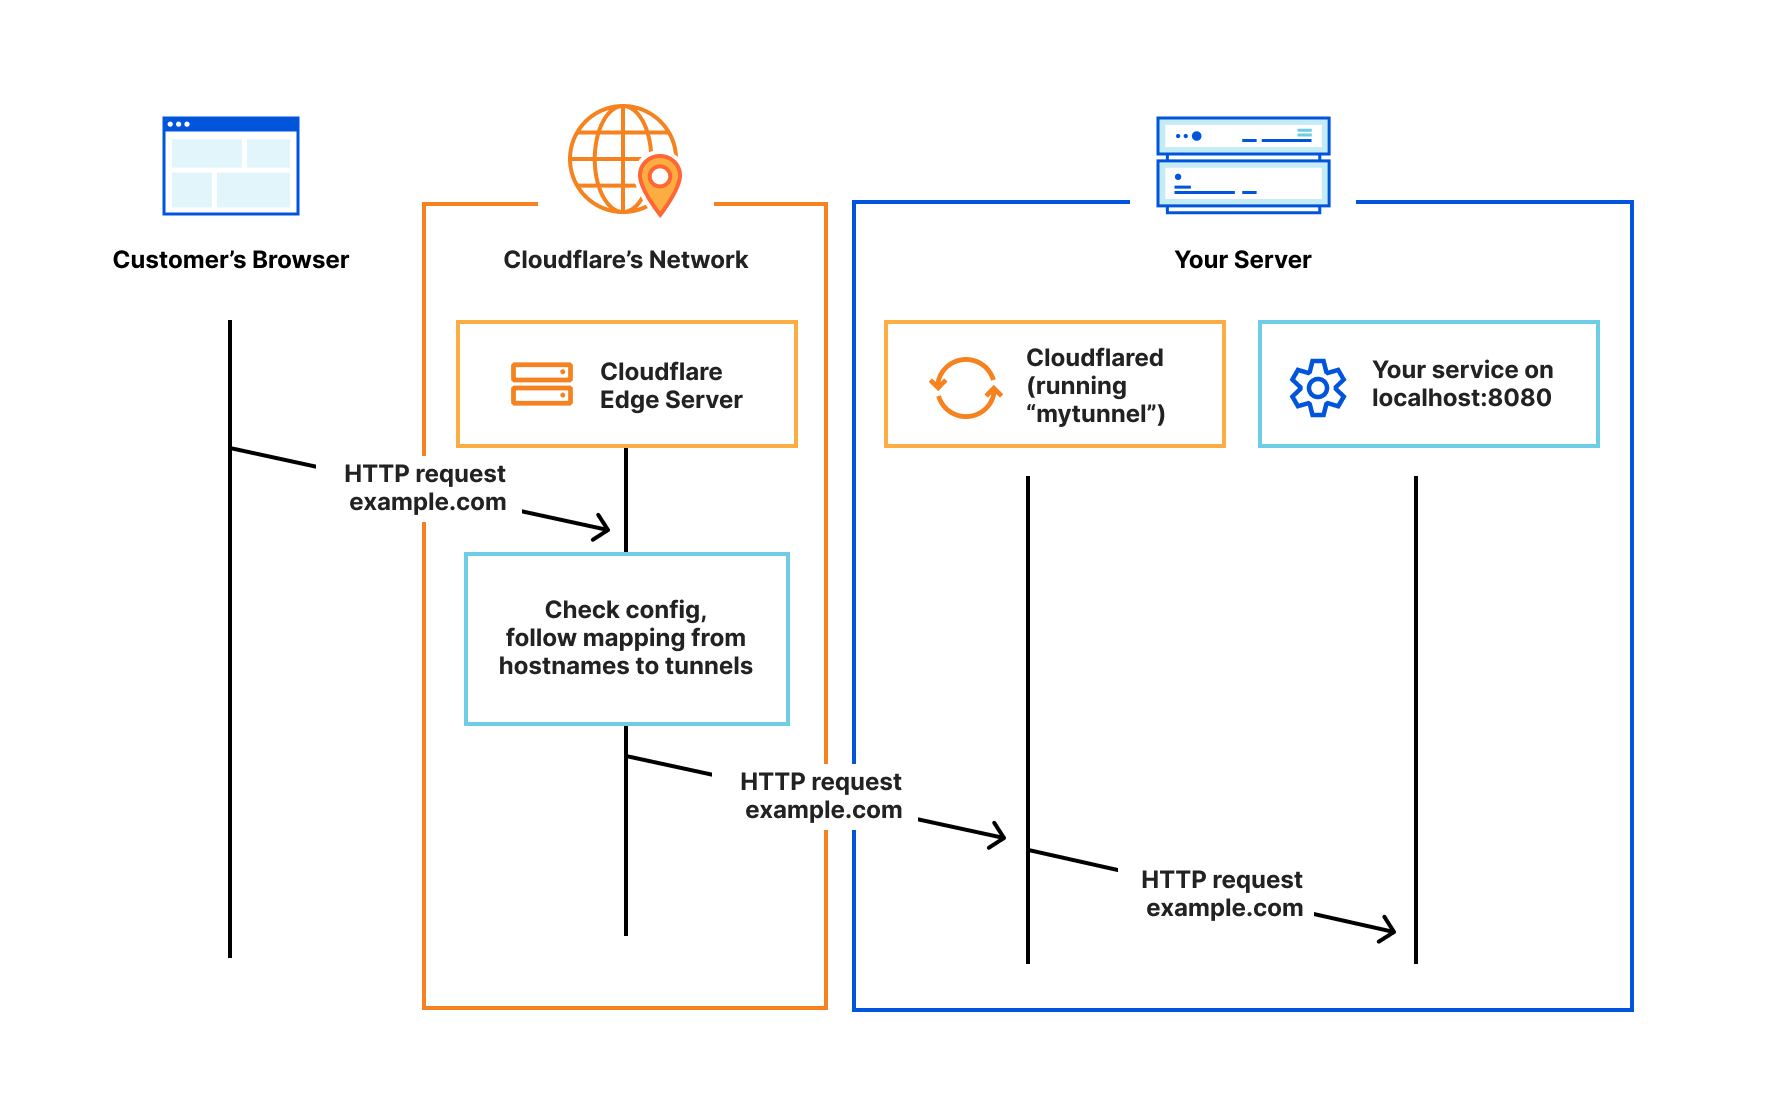
What is Cloudflare Tunnel?1
Cloudflare Tunel is a connection established between your resources and the Cloudflare edge without a publicly routable IP address. You send traffic through a lightweight daemon in your infrastructure directly to Cloudflare’s edge locations.
Configure docker container
We will start our journey with Zero Trust Console. Go to Access → Tunnels and click on „Create a tunnel”. Name your first tunnel, now we will configure the Cloudflare connector. In my case, it will be Docker container.
Below you can find an enhanced command with added -d, –name, and –restart flags:
docker run -d --name cloudflare-tunnel --restart unless-stopped cloudflare/cloudflared:latest tunnel --no-autoupdate run --token <token>Configure your first tunnel
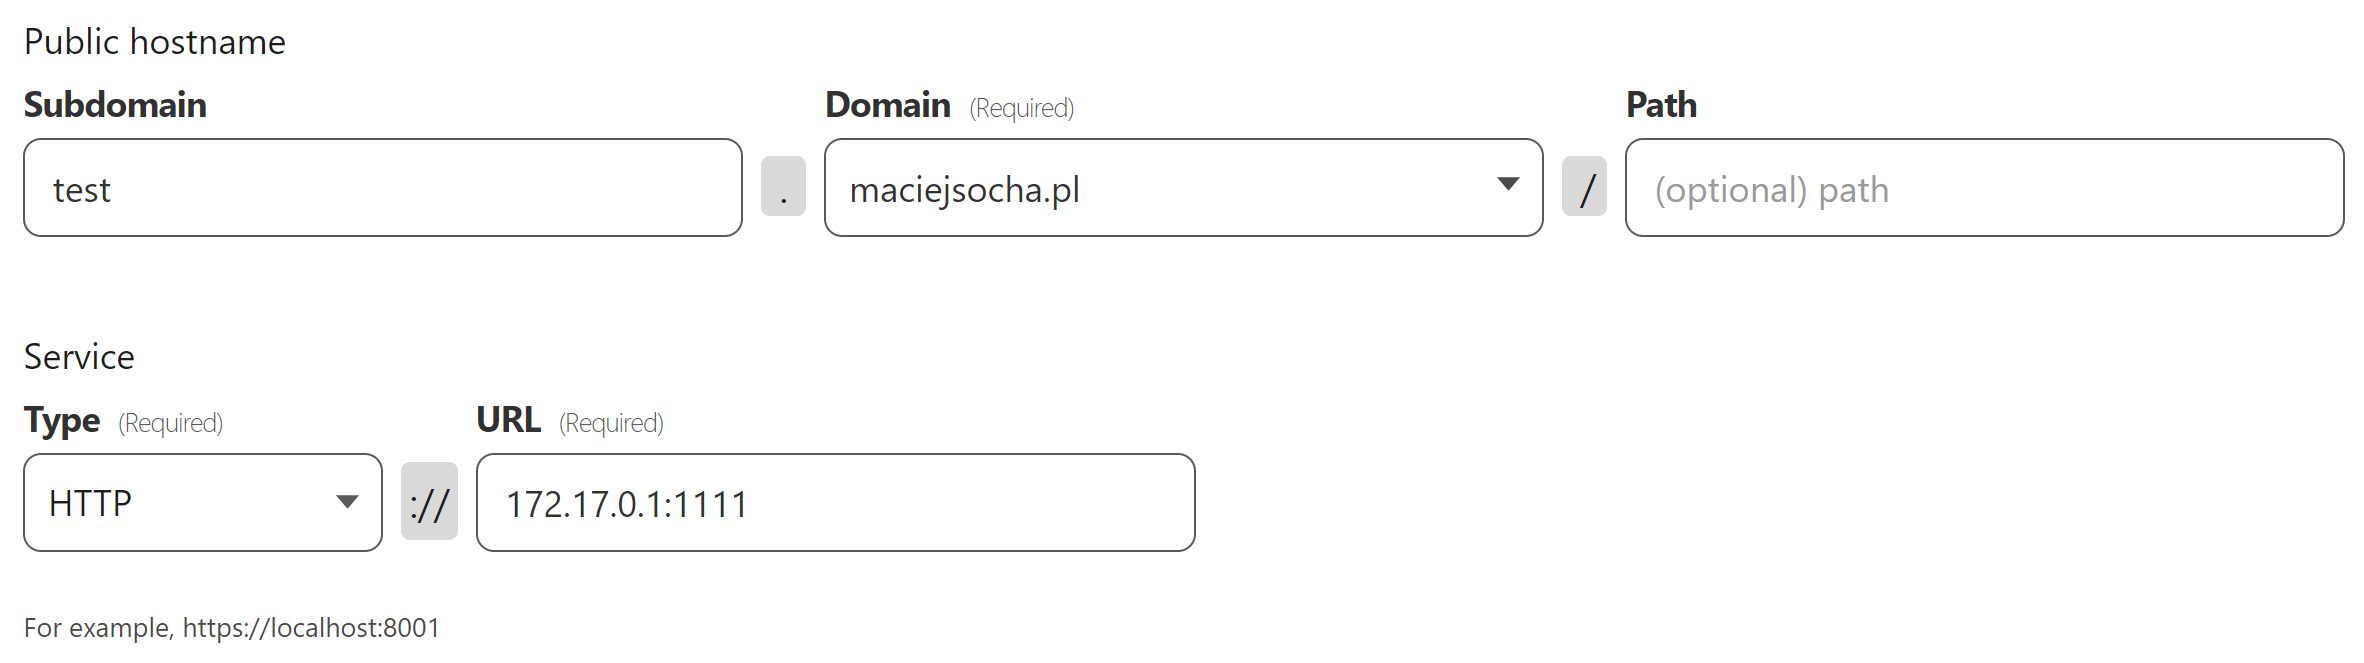
I will use the docker0 bridge connection (172.17.0.1) and point traffic to the 1111 port. We will use the „test” subdomain and HTTP connection.
It was so easy, right? Cloudflare one more time lived up to expectations.
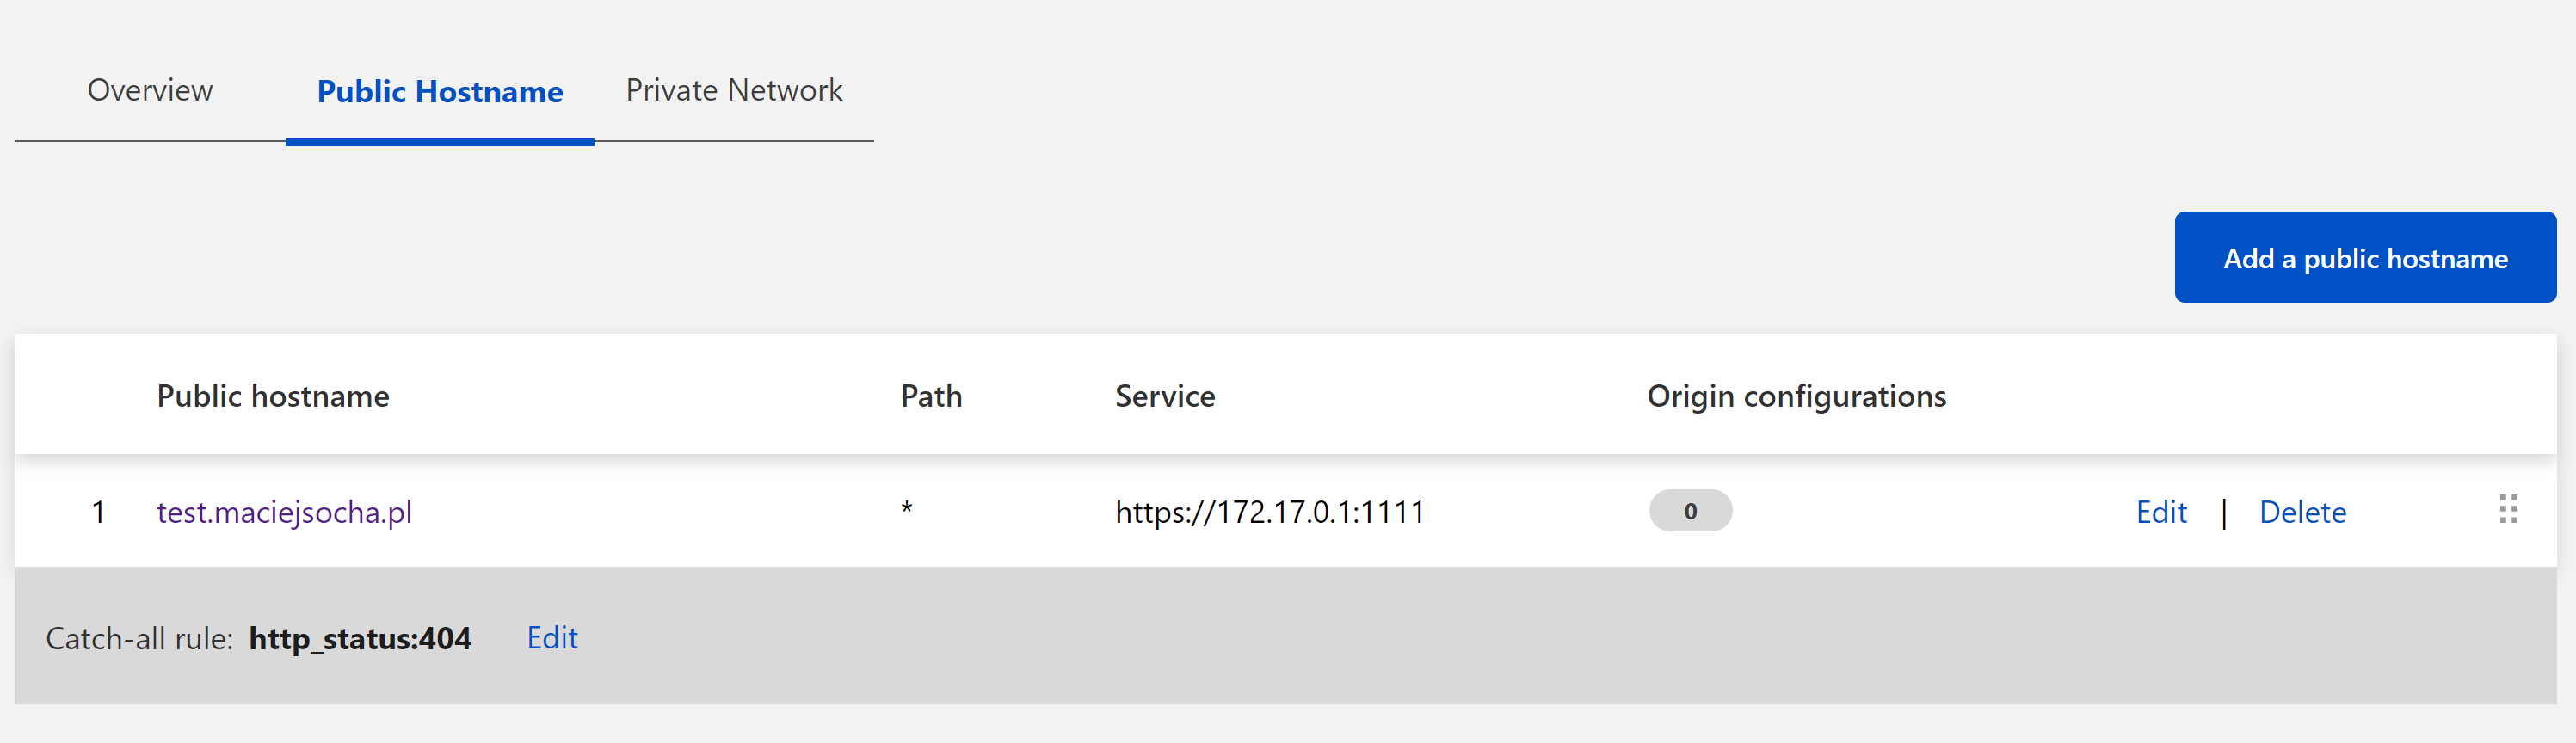
Now it’s time to test your subdomain. A tunnel should be created and the route configured, sample configuration is shown below:

Summary
The entire configuration should take under 5 minutes. Well, it’s faster than creating the Nginx server block (virtual host) from scratch. It’s possible that on this „docker server” I will give up Nginx completely and switch to Cloudflare Tunnels. Who knows…
Have you tried it? What’s your impression? Let me know in the comment section!